Quick Start
To start building projects with GitLab CI a few steps needs to be done.
1. Install GitLab and CI
First you need to have a working GitLab and GitLab CI instance.
You can omit this step if you use GitLab.com.
2. Create repository on GitLab
Once you login on your GitLab add a new repository where you will store your source code. Push your application to that repository.
3. Add project to CI
The next part is to login to GitLab CI. Point your browser to the URL you have set GitLab or use gitlab.com/ci.
On the first screen you will see a list of GitLab's projects that you have access to:

Click Add Project to CI. This will create project in CI and authorize GitLab CI to fetch sources from GitLab.
GitLab CI creates unique token that is used to configure GitLab CI service in GitLab. This token allows to access GitLab's repository and configures GitLab to trigger GitLab CI webhook on Push events and Tag push events. You can see that token by going to Project's Settings > Services > GitLab CI. You will see there token, the same token is assigned in GitLab CI settings of project.
4. Create project's configuration - .gitlab-ci.yml
The next: You have to define how your project will be built.
GitLab CI uses YAML file to store build configuration.
You need to create .gitlab-ci.yml in root directory of your repository:
before_script:
  - bundle install

rspec:
  script:
    - bundle exec rspec

rubocop:
  script:
    - bundle exec rubocop
This is the simplest possible build configuration that will work for most Ruby applications:
- Define two jobs
rspecandrubocopwith two different commands to be executed. - Before every job execute commands defined by
before_script.
The .gitlab-ci.yml defines set of jobs with constrains how and when they should be run.
The jobs are defined as top-level elements with name and always have to contain the script.
Jobs are used to create builds, which are then picked by runners and executed within environment of the runner.
What is important that each job is run independently from each other.
For more information and complete .gitlab-ci.yml syntax, please check the Configuring project (.gitlab-ci.yml).
5. Add file and push .gitlab-ci.yml to repository
Once you created .gitlab-ci.yml you should add it to git repository and push it to GitLab.
git add .gitlab-ci.yml
git commit
git push origin master
If you refresh the project's page on GitLab CI you will notice a one new commit:

However the commit has status pending which means that commit was not yet picked by runner.
6. Configure runner
In GitLab CI, Runners run your builds. A runner is a machine (can be virtual, bare-metal or VPS) that picks up builds through the coordinator API of GitLab CI.
A runner can be specific to a certain project or serve any project in GitLab CI. A runner that serves all projects is called a shared runner. More information about different runner types can be found in Configuring runner.
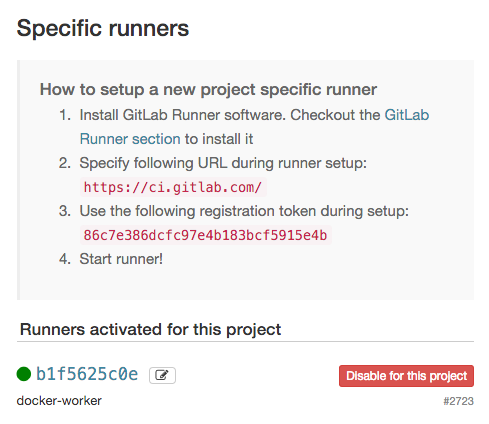
To check if you have runners assigned to your project go to Runners. You will find there information how to setup project specific runner:
- Install GitLab Runner software. Checkout the GitLab Runner section to install it.
- Specify following URL during runner setup: https://gitlab.com/ci/
- Use the following registration token during setup: TOKEN
If you do it correctly your runner should be shown under Runners activated for this project:
Shared runners
If you use gitlab.com/ci you can use Shared runners provided by GitLab Inc. These are special virtual machines that are run on GitLab's infrastructure that can build any project. To enable Shared runners you have to go to Runners and click Enable shared runners for this project.
7. Check status of commit
If everything went OK and you go to commit, the status of the commit should change from pending to either running, success or failed.
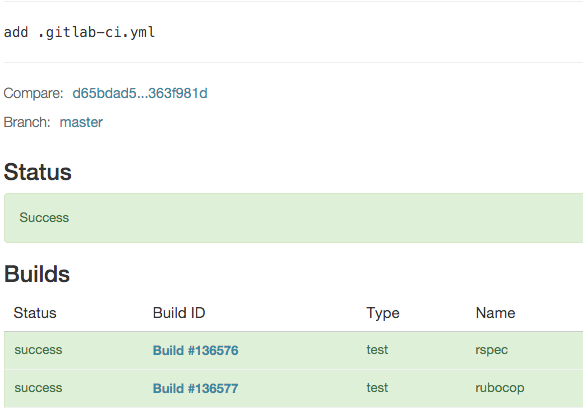
You can click Build ID to view build log for specific job.
8. Congratulations!
You managed to build your first project using GitLab CI.
You may need to tune your .gitlab-ci.yml file to implement build plan for your project.
A few examples how it can be done you can find on Examples page.
GitLab CI also offers the Lint tool to verify validity of your .gitlab-ci.yml which can be useful to troubleshoot potential problems.
The Lint is available from project's settings or by adding /lint to GitLab CI url.